
Transforming an 80-year-old fixer-upper into a charming farmhouse-inspired haven is a journey fraught with challenges and rewards. From the moment I stepped into my new home, I knew the kitchen would be the heart of my renovation project. This is the story of how I rejuvenated a tired and outdated space into a vibrant and functional farmhouse kitchen that now stands as the crown jewel of my home.
The Fixer-Upper Dilemma
The first glimpse of my new fixer-upper home filled me with both excitement and trepidation. It had character, history, and undeniable charm, but it also had its fair share of issues. Perhaps the most intimidating challenge was the kitchen, a lackluster “L” shaped space dominated by worn-out oak cabinets. The prospect of transforming this culinary zone on a tight budget seemed insurmountable at first, but little did I know that a vision of rustic farmhouse charm would guide me through every step of this transformative process.

Planning the Farmhouse Revival
One of the first lessons I learned in the world of home renovation is the power of a clear vision. Before diving into the nitty-gritty details, I took the time to envision what my kitchen could look like after the remodel. I imagined the welcoming ambiance, the warm and inviting colors, and how it would all come together in photos that I couldn’t wait to share with friends and family.

Cabinet Revival: The First Challenge
The existing cabinets were a source of considerable concern. Not only were they outdated in style, but several areas had also fallen victim to water and mold damage. I vividly remember peering under the sink and discovering remnants from an old canning session that had gone terribly wrong. The decision was clear; both shelves and their bottom panels needed to go. Thankfully, I had the foresight to stock up on Kilz paint primer in advance, knowing that it would be crucial to ensure the cabinets’ longevity.

Cabinet Preparation: The Crucial Step
Ensuring the utmost safety and durability of my cabinets was paramount. I opted for a two-step process, beginning with a coat of Kilz paint followed by a layer of latex. With this crucial measure in place, I was finally ready to infuse the room with color and life through the selection of the perfect hues.
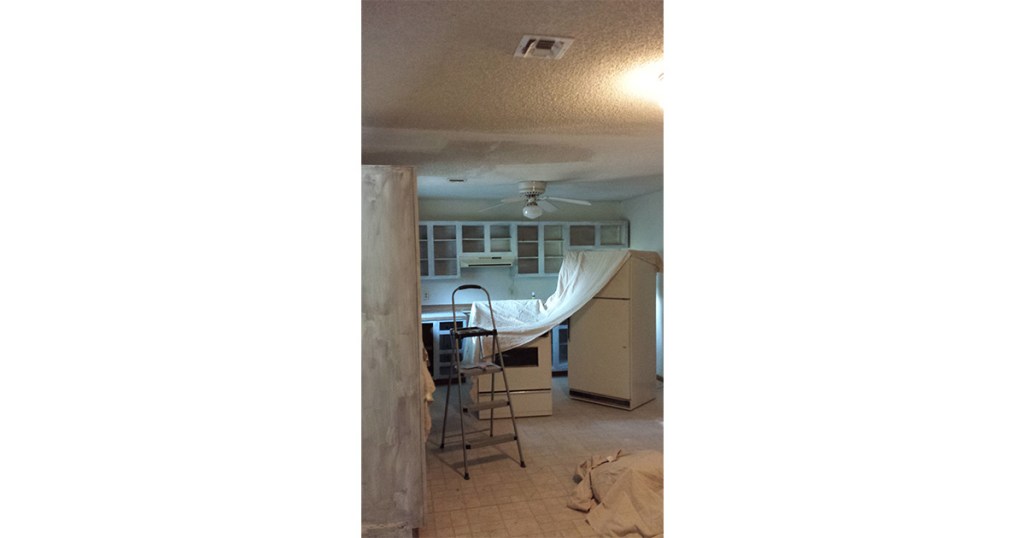
The Popcorn Ceiling Surprise
As I prepared to tackle the ceiling, a rather unexpected surprise greeted me. The popcorn texture, common in many older homes, began to crumble with each brushstroke of INSL-X Color-Changing Acrylic Ceiling Paint. It became apparent that during previous renovations, the popcorn had been sprayed onto the ceiling without proper priming or sealing. The only viable option was complete removal. Surprisingly, this task proved far simpler than expected, taking me a mere thirty minutes to complete half of the ceiling.

A Vibrant Makeover Begins
With the popcorn ceiling issue resolved, I gave it a vibrant makeover, transforming the once dull surface into a fresh, inviting expanse. The kitchen walls also underwent a dramatic change, transitioning into an inviting shade of blue that perfectly complemented my vision. To complete this contemporary design, all trim received a refreshed coat of white paint, providing an eye-catching contrast that never failed to delight the eye.
Upper and Lower Cabinets: The Progress
The transformation of my cabinets represented a pivotal moment in my kitchen renovation journey. I decided on a distinctive two-tone approach, with the lower cabinets painted in a captivating turquoise and the upper ones adorned in crisp white. Instead of replacing the dishwasher, I found an innovative way to repurpose it, converting it into a clever trash can holder. To maintain its original charm while enhancing functionality, I thoroughly cleaned and reinstated the bronze handles.

The Harmony of Colors
The harmonious blend of turquoise and white on the cabinets proved to be a winning combination. To maximize the impact, I opted to paint the decorative piece above the sink in white, providing a tasteful contrast to the vibrant turquoise below. While budget constraints were a consideration, I made the decision to keep my existing countertop, as it remained in excellent condition. As for the refrigerator, it had seen better days, prompting me to select a new one that seamlessly matched the kitchen’s theme—an interactive chalkboard menu.

Sample Tiles and Leftover Supplies: An Unexpected Twist
As I reflected on my summer Home Depot projects, a revolutionary idea sparked within me. Could I use sample tiles from the store to breathe new life into my refrigerator’s chalkboard surface? While budgetary restrictions might have made this seem unlikely, the results were nothing short of stunning.
Get notified when we post new content!

Custom Kitchen Island: Crafting the Heart of the Kitchen
Creating a kitchen island was a fundamental part of my farmhouse-inspired vision. I began by acquiring two 36″ base cabinets from Ikea, deliberately opting for versions without cabinet doors or legs. The idea was to craft a unique, open-storage kitchen island with an industrial look that would serve as the heart of the space. However, a crucial component was still missing: the butcher block countertop.

Adding the Butcher Block Countertop: A Perfect Fit
After meticulously painting each element to match my cabinet colors, I began assembling the pieces that would form the kitchen island. The final touch was adding swivel locking casters, providing the island with mobility for easy floor cleaning. The result was a remarkable, multifunctional island that not only offered workspace but also provided seating for family and friends. To enhance the industrial-farmhouse aesthetic, I framed the island with chicken coop boards, mirroring the rustic charm seen elsewhere in the kitchen.
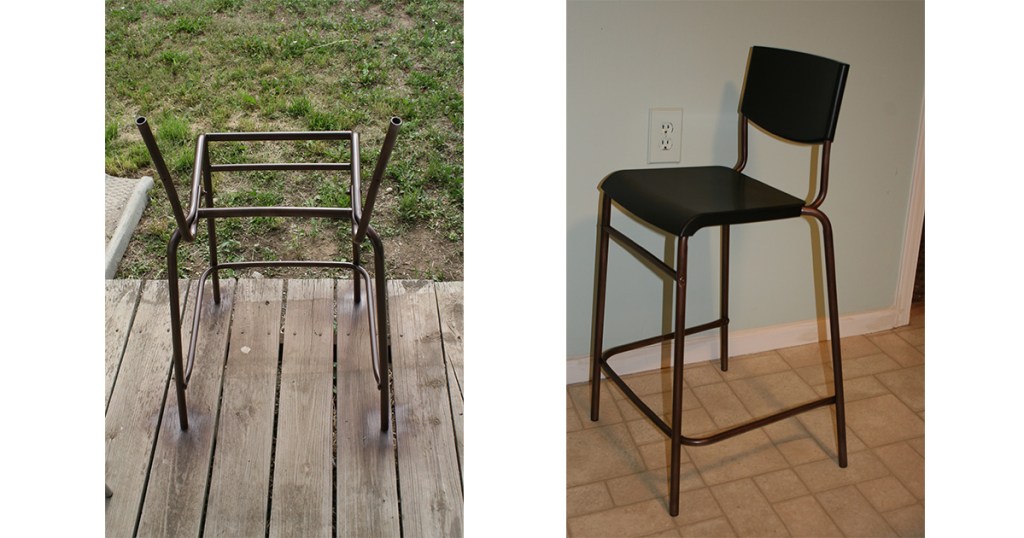
Modern Industrial Seating: Elevating the Design
To complete the seating area, I sought counter-height stools with backrests and stainless steel frames. To achieve a cohesive look, I sprayed the frames with Rust-Oleum’s Metallic Flat Burnished Amber paint, perfectly matching them to the water pipes featured on the workspace wall. This simple yet effective touch added an attractive edge to the kitchen that couldn’t be ignored.

Wire Racks and Final Flourishes: A Cozy Finish
To infuse a cozy, farmhouse-style atmosphere, I employed a bronze curtain panel as trim around the dishwasher opening and above the sink. An adjustable tension rod under the countertop enabled me to add a curtain to cover the dishwasher opening when needed. Additionally, I installed white wire racks on the side of the island to provide convenient storage for napkins and other essentials.
Final Thoughts: A Lavor of Love
As I reflect on my farmhouse kitchen renovation project, a profound sense of satisfaction washes over me. The journey from a dated, uninspiring kitchen to a vibrant, functional space has been nothing short of remarkable. It serves as a testament to what can be achieved through a combination of creativity, hard work, and a dash of luck.

The Power of Reuse and DIY
Throughout this renovation, I discovered the incredible power of reusing old items and trying out DIY projects. With the right tools and materials, seemingly impossible transformations become attainable. My farmhouse kitchen is a testament to the limitless potential that can be unlocked through imagination, determination, and just a touch of serendipity.
Embark on Your Renovation Journey
In the end, I’m left with a beautiful and highly functional farmhouse kitchen that perfectly embodies my style and personality. The


